WebView allows you to create your own window for viewing web pages (or even
develop a complete browser). In this tutorial, you'll create a simple Activity
that can view and navigate web pages.
- Create a new project named HelloWebView.
- Open the
res/layout/main.xmlfile and insert the following:<?xml version="1.0" encoding="utf-8"?> <WebView xmlns:android="http://schemas.android.com/apk/res/android" android:id="@+id/webview" android:layout_width="fill_parent" android:layout_height="fill_parent" /> - Now open the
HelloWebView.javafile. At the top of the class, declare aWebViewobject:WebView mWebView;
Then use the following code for the
onCreate()method:public void onCreate(Bundle savedInstanceState) { super.onCreate(savedInstanceState); setContentView(R.layout.main); mWebView = (WebView) findViewById(R.id.webview); mWebView.getSettings().setJavaScriptEnabled(true); mWebView.loadUrl("http://www.google.com"); }This initializes the member
WebViewwith the one from theActivitylayout; requests aWebSettingsobject withgetSettings(); and enables JavaScript for theWebViewwithsetJavaScriptEnabled(boolean). Finally, an initial web page is loaded withloadUrl(String). - Because this application needs access to the Internet, you need to add the appropriate
permissions to the Android manifest file. Open the
AndroidManifest.xmlfile and add the following as a child of the<manifest>element:<uses-permission android:name="android.permission.INTERNET" />
- While you're in the manifest, give some more space for web pages by removing the title
bar, with the "NoTitleBar" theme:
<activity android:name=".HelloWebView" android:label="@string/app_name" android:theme="@android:style/Theme.NoTitleBar"> - Now run the application.
You now have a simplest web page viewer. It's not quite a browser yet because as soon as you click a link, the default Android Browser handles the Intent to view a web page, because this
Activityisn't technically enabled to do so. Instead of adding an intent filter to view web pages, you can override theWebViewClientclass and enable thisActivityto handle its own URL requests. - In the
HelloAndroidActivity, add this nested class:private class HelloWebViewClient extends WebViewClient { @Override public boolean shouldOverrideUrlLoading(WebView view, String url) { view.loadUrl(url); return true; } } - Then towards the end of the
onCreate(Bundle)method, set an instance of theHelloWebViewClientas theWebViewClient:mWebView.setWebViewClient(new HelloWebViewClient());
This line can go anywhere following the initialization of the
WebViewobject.This creates a
WebViewClientthat will load any URL selected from thisWebViewinto the sameWebView. TheshouldOverrideUrlLoading(WebView, String)method is passed the currentWebViewand the URL requested, so all it needs to do is load the URL in the given view. Returningtruesays that the method has handled the URL and the event should not propagate (in which case, an Intent would be created that's handled by the Browser application).If you run the application again, new pages will now load in this Activity. However, you can't navigate back to previous pages. To do this, you need to handle the BACK button on the device, so that it will return to the previous page, rather than exit the application.
- To handle the BACK button key press, add the following method inside the
HelloWebViewActivity:@Override public boolean onKeyDown(int keyCode, KeyEvent event) { if ((keyCode == KeyEvent.KEYCODE_BACK) && mWebView.canGoBack()) { mWebView.goBack(); return true; } return super.onKeyDown(keyCode, event); }This
onKeyDown(int, KeyEvent)callback method will be called anytime a button is pressed while in the Activity. The condition inside uses theKeyEventto check whether the key pressed is the BACK button and whether theWebViewis actually capable of navigating back (if it has a history). If both are true, then thegoBack()method is called, which will navigate back one step in theWebViewhistory.Returningtrueindicates that the event has been handled. If this condition is not met, then the event is sent back to the system. - Run the application again. You'll now be able to follow links and navigate back through the page history.
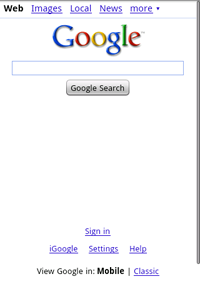
When you open the application, it should look like this: